===
I assume that many visitors to my site want to develop games, and so I've written this quickie tutorial on how to write a simple demonstration game using the PyGame library with Python programming language.
In addition, I'm also gonna guess that any end-user here has already made up their mind with what API and language to use, and so I'm not going to waste time pissing about to defuse the DirectX and VB trolls; this is a Pygame tutorial and if you're here you want to use Pygame. Don't like it? Your web browser has a feature to go to other pages.
I'm also assuming that you installed Pygame and Python already, the pages for each have great instructions on how to get it set up for your respective OS or computer.
I'll be building this demo in this tutorial, it's not very advanced so experienced grognards should go elsewhere as well.
Code will be put in a box like this.
Okay, ready to go? We're going to start with a quick and simple overview of the components of a videogame first.
- Drawing stuff -- this involves drawing polygons, sprites, textures, fonts, whatever.
- Getting input -- this is when you read from the player's control stick, keyboard, mouse, satellite uplink, brainwave generator, whatever.
- Logic -- this is where you move characters about in the game world, do collision detection, count how many rounds of ammo the player has, etc. Physics can fall into here, for example, as will AI.
Well, that's fair enough. I know I always learn best from code, so I'm going to post the source to the simple Pygame demo that I developed for this article, and then I'll explain it more or less line by line.
import os, pygame

from pygame.locals import *


def main():

	# start the game engine

	pygame.init() 			# start pygame

	screen = pygame.display.set_mode((640, 480))

	pygame.display.set_caption("Ravuya's Demo")

	pygame.mouse.set_visible(0)	# hide mouse

	# load images and objects and such

	clock = pygame.time.Clock()

	steve = Steve()

	# make the background

	background = pygame.Surface(screen.get_size())

	background = background.convert()

	background.fill((100, 125, 0))

	# test blit

	screen.blit(background, (0,0))

	pygame.display.flip()

	# add the sprites to the render group

	allsprites = pygame.sprite.RenderPlain(steve)

	# main loop

	while 1:

		# update game timer, capped at 60fps

		clock.tick(60)

		# get input

		for event in pygame.event.get():

			if event.type == QUIT:

				return

			elif event.type == MOUSEBUTTONDOWN:

				steve.thrust()

			elif event.type == KEYDOWN:

				if event.key == K_ESCAPE:

					return

		# draw everything

		allsprites.update()

		screen.blit(background, (0,0))

		allsprites.draw(screen)

		pygame.display.flip()

	# game over

class Steve(pygame.sprite.Sprite):

	def __init__(self):

		pygame.sprite.Sprite.__init__(self)	# create Sprite

		self.image, self.rect = load_image('steve.bmp', -1)

		screen = pygame.display.get_surface()

		self.area = screen.get_rect()

		self.rect.bottomleft = 0, 480		# start at lower left

		self.acceleration = 0

	def update(self):

		self.acceleration += 1

		self.rect.move_ip(0, self.acceleration)

		if self.rect.bottom > self.area.bottom:  # went too far!

			self.rect.bottomleft = 0, 480	# reset

			self.acceleration = -self.acceleration *.5

	def thrust(self):

		self.acceleration -= 30

def load_image(name, colorkey=None):

	# thanks to http://pygame.org/docs/tut/chimp/chimp.py.html

	fullname = os.path.join('data', name)

	try:

		image = pygame.image.load(fullname)

	except pygame.error, message:

		print 'Cannot load image, ', fullname

		raise SystemExit, message

	image = image.convert()

	if colorkey is -1:

		colorkey = image.get_at((0,0))

	image.set_colorkey(colorkey, RLEACCEL)

	return image, image.get_rect()


if __name__ == '__main__': main()
Want to save yourself the typing? Can't blame you. Click here to get the source archive.
Anyway, what you should end up with is something like this:
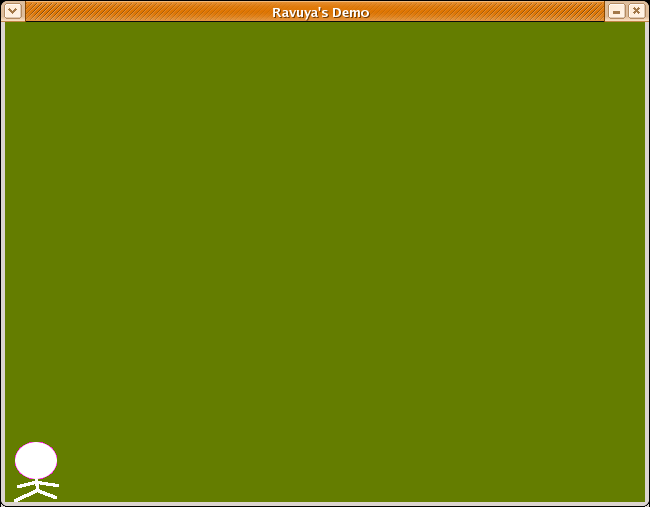
Pretty neat, huh? Tap the mouse repeatedly to make Steve jump higher and higher. Now for the breakdown...
import os, pygame

from pygame.locals import *
This is pretty straightforward. It tells the python interpreter what 'modules' (think add-on files) to load so it can use them.
def main():
This is a function definition, and is our application entry point.
	# start the game engine

	pygame.init() 			# start pygame

	screen = pygame.display.set_mode((640, 480))

	pygame.display.set_caption("Ravuya's Demo")

	pygame.mouse.set_visible(0)	# hide mouse
This tells the game to start up Pygame, make a screen surface (effectively, our window, in 640x480 resolution), and to name the window something catchy. It also hides the mouse cursor while it's hovering over our Pygame window.
# load images and objects and such

	clock = pygame.time.Clock()

	steve = Steve()

	# make the background

	background = pygame.Surface(screen.get_size())

	background = background.convert()

	background.fill((100, 125, 0))
This makes new Clock (game time keeper) and Steve (jumpy guy) objects. It also creates our background texture, which is that ugly-ass colour in the background that you can see, with RGB colour 100,125,0.
	# test blit

	screen.blit(background, (0,0))

	pygame.display.flip()

	# add the sprites to the render group

	allsprites = pygame.sprite.RenderPlain(steve)
This blits the background to the window, so it's ready for our first frame (and it doesn't look really ugly while the game is off loading textures, or whatever). It also adds Steve to the rendering plan, using a powerful data structure called a Group native to Python. pygame.display.flip updates the screen surface with what we just drew.
	while 1:

		# update game timer, capped at 60fps

		clock.tick(60)
This effectively locks Python to 60fps so that the game doesn't go too quickly.. this also means that everything in Steve's update() function is run 60 times per second on a reasonably quick PC. You might want to use delta time or another framerate independence method for a more intensive game. It also kicks off our main game loop.
		# get input

		for event in pygame.event.get():

			if event.type == QUIT:

				return

			elif event.type == MOUSEBUTTONDOWN:

				steve.thrust()
This tells our game to poll the input devices that pygame knows about for a change. Then it says, "If the user quit, get out of here, and if the user pressed a button tell Steve to thrust." Consult the Python documentation if you want to read keys or joysticks.
		# draw everything

		allsprites.update()

		screen.blit(background, (0,0))

		allsprites.draw(screen)

		pygame.display.flip()
This is the end of our main game loop. It tells all of the sprites to run their update() method, draws the background to screen (shortly followed by drawing all the sprites to screen) and then updates the screen so we can see them.
class Steve(pygame.sprite.Sprite):

	def __init__(self):

		pygame.sprite.Sprite.__init__(self)	# create Sprite

		self.image, self.rect = load_image('steve.bmp', -1)

		screen = pygame.display.get_surface()

		self.area = screen.get_rect()

		self.rect.bottomleft = 0, 480		# start at lower left

		self.acceleration = 0
This defines our Steve object, and what it will do when it is first created. Namely, it sets variables, loads the bitmap image that is its graphical representation, and asks the screen surface how big it is (for collision purposes in update()).
	def update(self):

		self.acceleration += 1

		self.rect.move_ip(0, self.acceleration)

		if self.rect.bottom > self.area.bottom:  # went too far!

			self.rect.bottomleft = 0, 480	# reset

			self.acceleration = -self.acceleration *.5
This is likely our most important method in the entire program. It's what tells Steve how to deal with life every frame. Namely, it increases the speed of his fall back to Earth, and also detects when he's hit the bottom of the screen and stops his fall from continuing any further (in fact, it bounces quite hilariously). It also moves his picture about.
	def thrust(self):

		self.acceleration -= 30
When our user taps the mouse button, Steve's acceleration is increased by 30 pixels per frame upward. Of course, during update() it will be increased by 1 pixel per frame in the opposite direction, making his travel a nice parabolic arc.
def load_image(name, colorkey=None):

	# thanks to http://pygame.org/docs/tut/chimp/chimp.py.html

	fullname = os.path.join('data', name)

	try:

		image = pygame.image.load(fullname)

	except pygame.error, message:

		print 'Cannot load image, ', fullname

		raise SystemExit, message

	image = image.convert()

	if colorkey is -1:

		colorkey = image.get_at((0,0))

	image.set_colorkey(colorkey, RLEACCEL)

	return image, image.get_rect()
This function comes from the Chimp tutorial on Pygame.org; it loads an image that Pygame supports with a given translucency key. If you provide -1 as the colourkey, it will use the colour value at the top-left pixel of the image for translucency. If it can't find the image, it quits.
if __name__ == '__main__': main()
Python breaks code up into modules, which are similar to Java packages and Pascal units; when the Python interpreter is going through a module, it will set the __name__ variable to __main__ if and only if that module is intended to be the "main" one (i.e. your game code). Then, we just take advantage of this, and tell the Python interpreter what to do in this situation (run the main function).
This is also useful for unit testing, but that's another article.
Well, there you go. That's your first Pygame application. It's not perfect the way I coded it, so feel free to experiment and such, and definitely read the Chimp tutorial on Pygame.org now that you understand a bit more about how Pygame works. Pygame is an excellent software package, and offers many features that would be nice to backport into the C SDL API.